





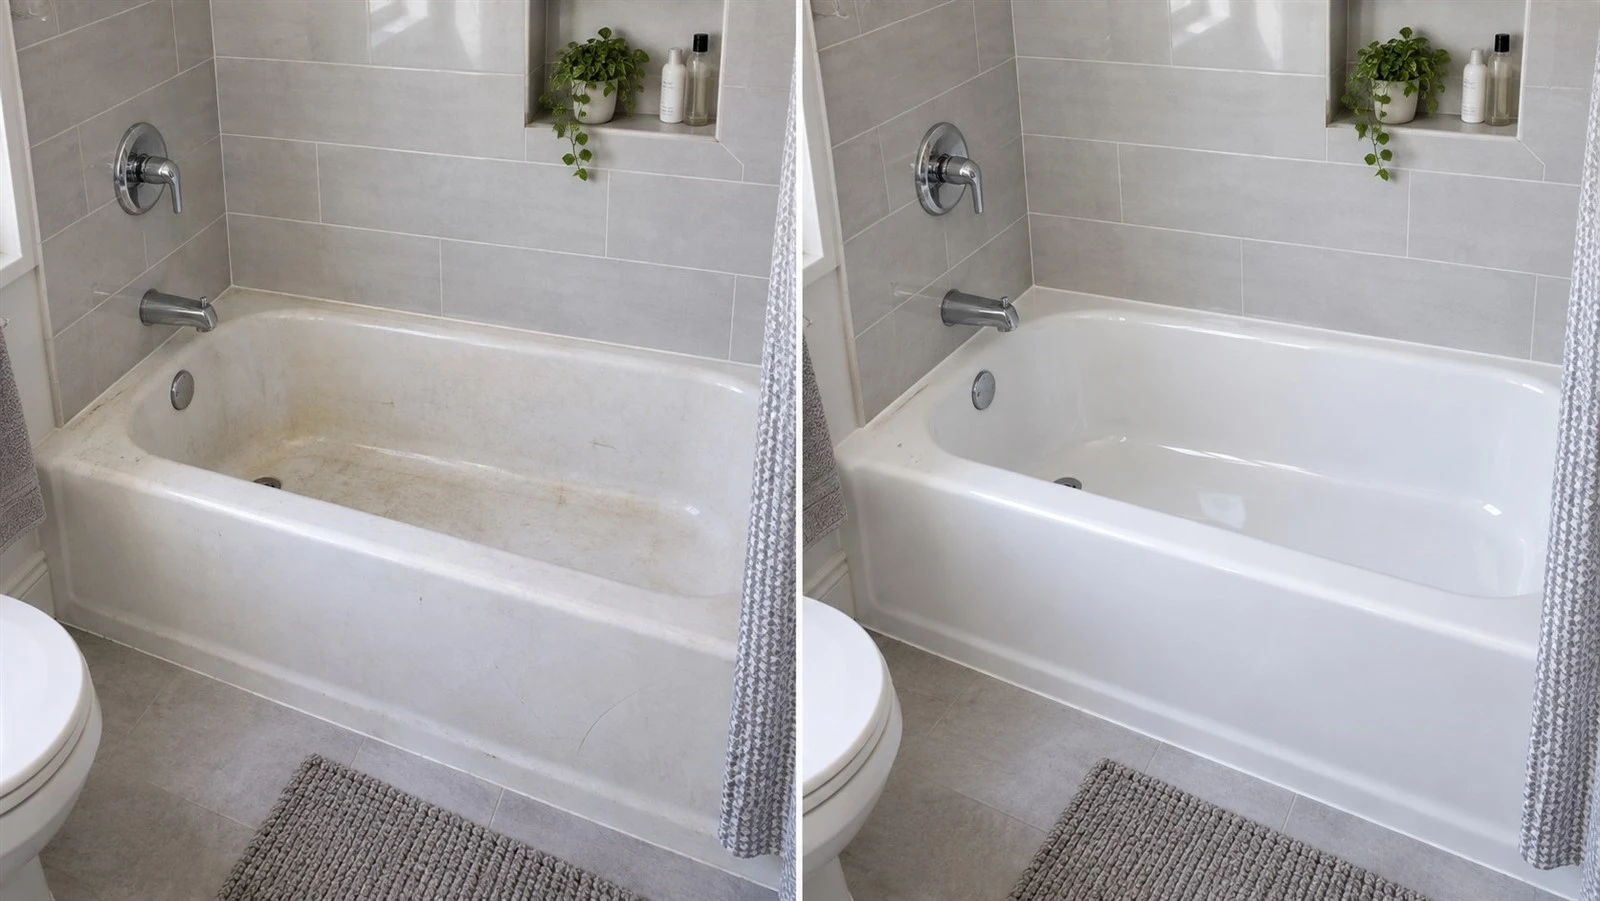
Reglazing a bathtub means cleaning and repairing the old surface, prepping it so a new coating can bond, applying the compatible primer and finish coats, and letting the whole system cure before you use the tub again. The sequence itself is simple. What separates a good job from a bad one is the prep work and the safety controls, not the final coat. A clean, structurally sound tub is a decent candidate. A tub that leaks, flexes, has a major crack, or is heavily corroded usually needs repair beyond simple refinishing - or replacement.
Below I'll walk you through the process, where DIY kits fall short, typical U.S. costs, and the signs that reglazing is no longer the sensible option.
What Does Bathtub Reglazing Mean?
Bathtub reglazing renews the surface, not the tub itself. The old finish gets cleaned and mechanically or chemically prepared, minor damage is repaired, and a new coating system goes on top. Done well, it can improve color, gloss, stain resistance, and how easy the tub is to clean - but it won't rebuild the tub's structure.
People use reglazing, refinishing, and resurfacing to mean the same thing, and the label matters less than the details. When you get quotes, compare the preparation method, coating system, ventilation plan, cure time, and warranty - not the word they chose to describe it.
Should You Reglaze or Replace Your Bathtub?
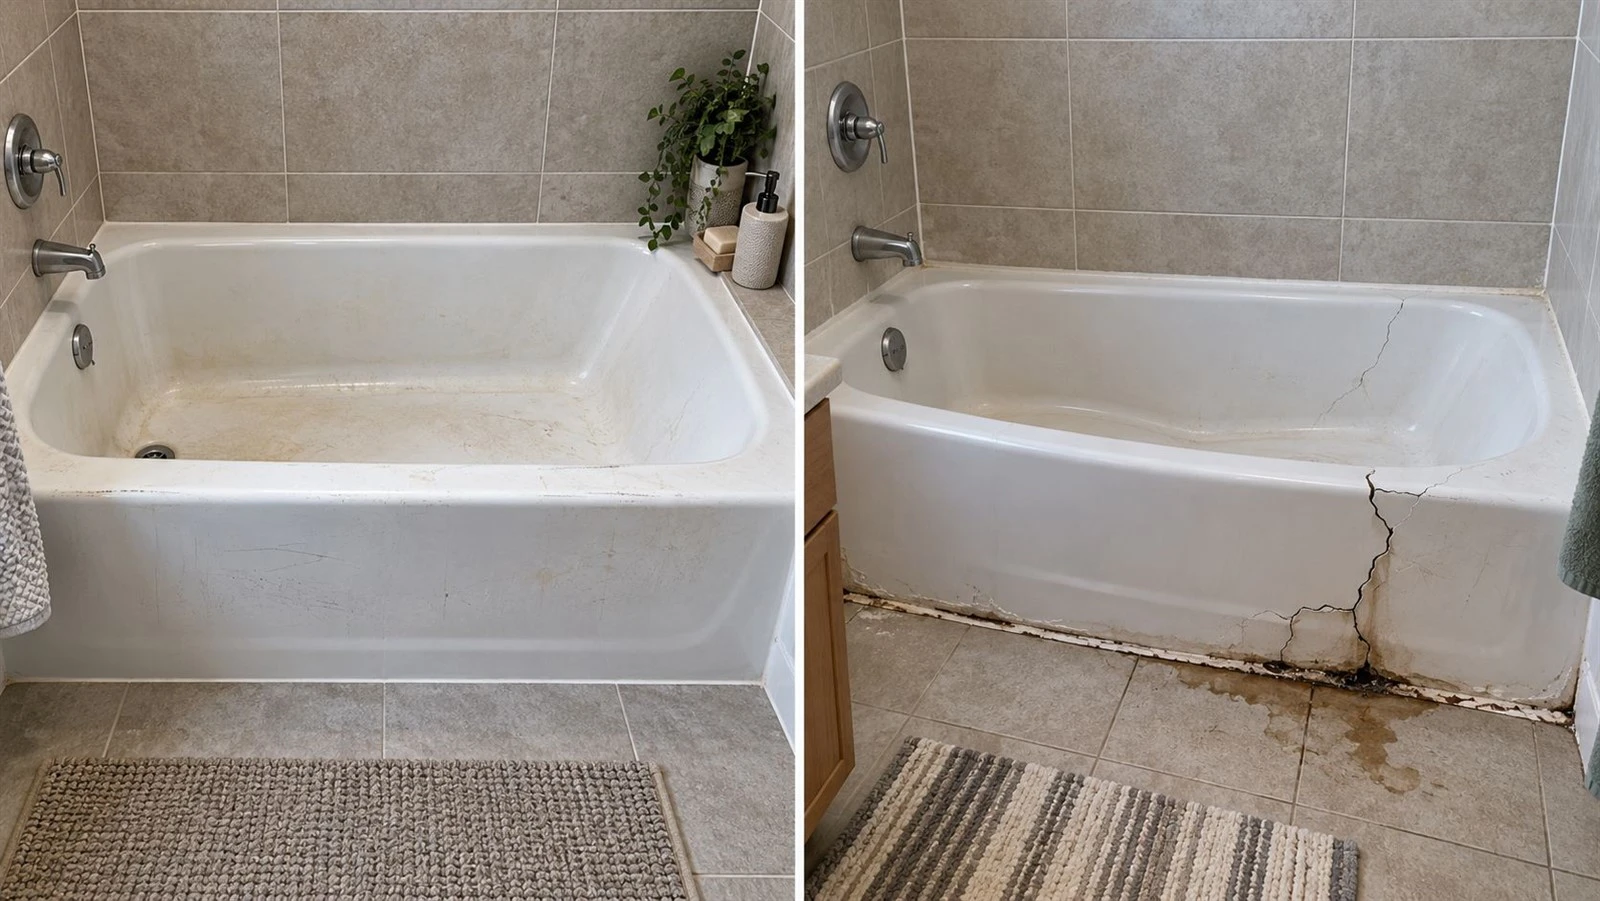
Reglazing makes sense when the tub still fits the room, sits stable, drains properly, and its problems are mostly cosmetic - dullness, stubborn staining, an outdated color, light scratches, or small chips that can be repaired. It's also the way to keep a heavy cast-iron tub, or an unusual size that would be difficult to remove without disturbing tile, flooring, or plumbing.
Replacement usually wins when the tub has a major crack, an active leak, a floor that flexes, severe rust-through, widespread delamination, or poor support. Reglazing won't fix plumbing defects, hidden water damage, or a layout the household has outgrown. A previously refinished tub can be coated again, but the failing layer usually has to come off first, which adds labor and cost.
Material matters too. Porcelain-enameled steel, cast iron, fiberglass, and some acrylic tubs can be refinished, but only with systems designed for those surfaces. Confirm compatibility with the coating manufacturer or the refinishing contractor. Don't assume one kit works on every tub.
Can You Reglaze a Bathtub Yourself?
A careful homeowner can sometimes get good results with a roll-on or brush-on kit, on a sound tub in an isolated, ventilated room. DIY is most realistic for light cosmetic wear, when the product is compatible with the tub and doesn't call for spray equipment or hazardous stripping chemicals.
Hire a pro if the existing finish is peeling, the tub has already been refinished, the repairs are extensive, the job needs spray application, or you can't set up proper exhaust ventilation. Professionals also have a much better shot at an even finish around curves, drains, overflow openings, and vertical walls.
Don't judge risk by smell alone. Read the label and the Safety Data Sheet for every cleaner, filler, primer, and coating, and use only the respiratory, eye, skin, and ventilation controls that product specifies. A dust mask will not stop solvent vapor. The U.S. Environmental Protection Agency prohibits consumer paint and coating removers containing methylene chloride and warns against using old products that still contain it. If an old coating needs aggressive stripping, have a professional assess it first - that's the safer route.
What You Need Before You Start
Work from the list that comes with the refinishing system. Typical materials: degreaser, caulk-removal tools, compatible repair filler, the specified abrasives, painter's tape, plastic sheeting, lint-free cloths, mixing containers, and the full primer-and-topcoat system. You may also need new caulk and gaskets.
Before you open the coating, check the temperature and humidity limits, ventilation requirements, recoat windows, and cure time. Keep children, pets, and anyone sensitive to fumes out of the work zone.
How Do You Reglaze a Bathtub Step by Step?
Follow the product instructions whenever they differ from this general sequence. Mixing components from unrelated systems can cause poor adhesion or unpredictable curing.
1. Remove caulk and accessible hardware
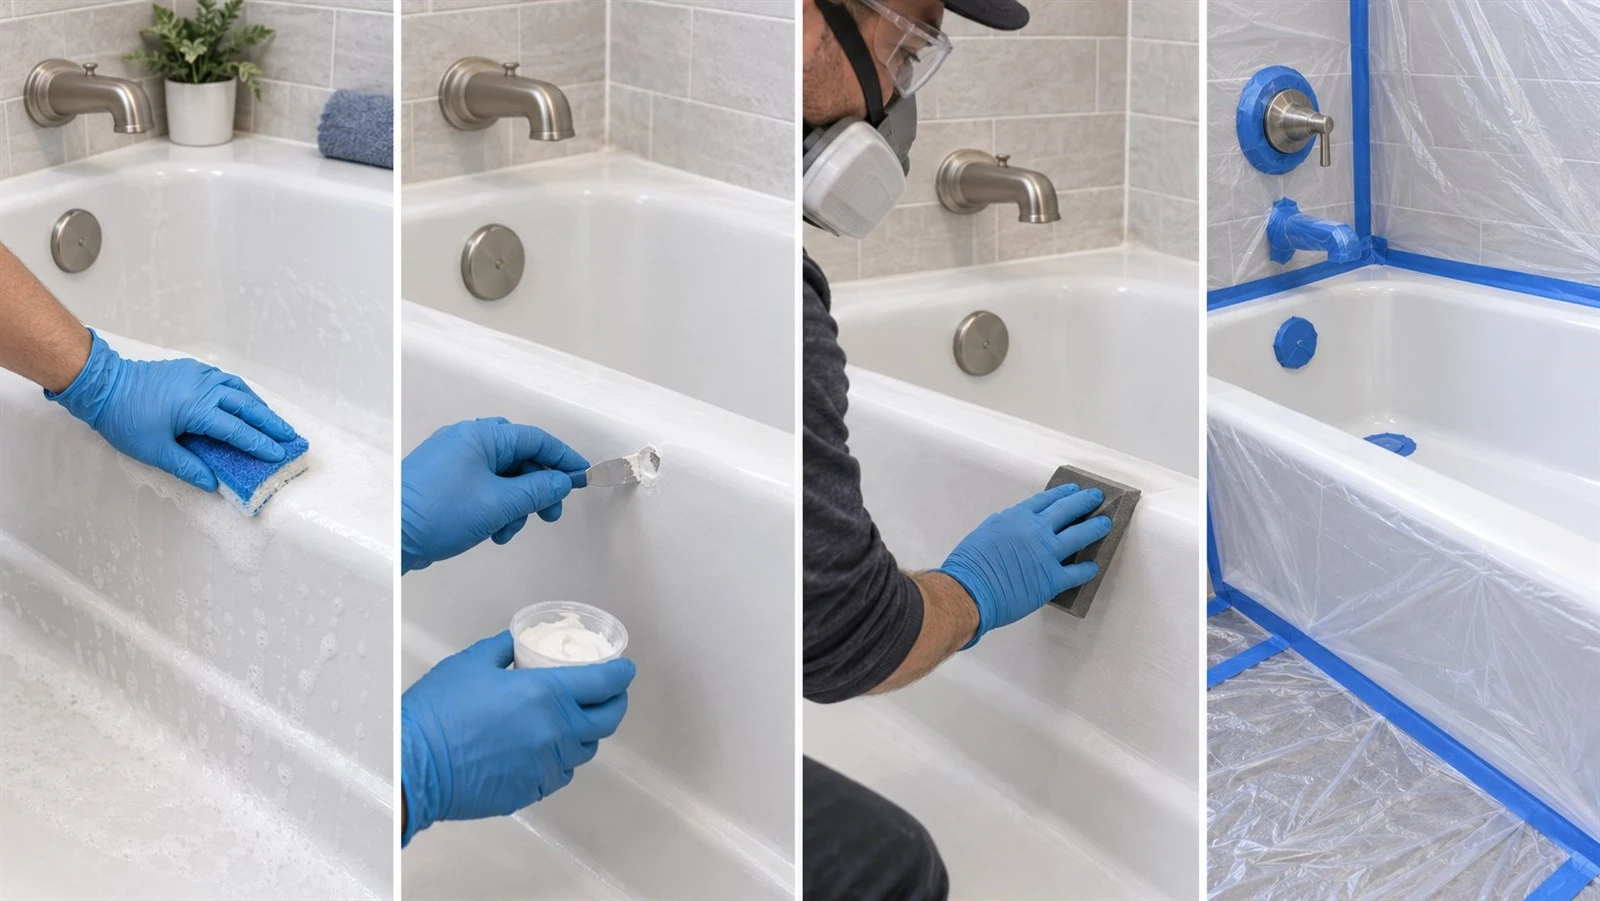
Remove the old perimeter caulk - don't paint over it. Where the plumbing layout and your skill level allow, take off the drain trim, overflow cover, spout, and anything else that blocks a clean edge. Leave plumbing alone if you can't safely reconnect it. Cover the drain opening so debris doesn't fall into the pipe.
2. Clean and degrease the entire surface
Soap film, body oils, wax, silicone residue, mineral deposits, and leftover cleaner can all wreck adhesion. Wash the tub methodically, rinse, and repeat as the kit directs. Pay extra attention to the waterline, drain area, corners, textured floor, and the joint below the overflow. Let everything dry completely.
3. Repair chips and minor surface damage
Remove loose material, and treat rust only as the repair system instructs. Fill the chips, pits, and shallow defects the kit permits with a compatible repair compound. Once it cures, sand the repair flush and remove all dust. Large cracks, recurring cracks, or a floor that flexes under pressure need a structural evaluation, not a cosmetic patch.
4. Prepare the surface for adhesion
The new finish needs a uniformly prepared surface. Depending on the tub and the coating system, that means sanding, an approved etching step, or a proprietary bonding treatment. Skipping the glossy areas is one of the most common causes of peeling. Avoid improvised acid mixtures and unapproved strippers, and never sand an old coating you can't identify until you've considered whether it might contain hazardous material.
5. Mask and ventilate the bathroom
Vacuum and wipe away dust, then mask the walls, floor, fixtures, and openings that have to stay uncoated. If the product requires exhaust, vent it outdoors - don't just push vapors into another room people use. Keep ignition sources away from anything flammable. If you can't meet the stated ventilation or protective-equipment requirements, stop and hire a qualified refinisher.
6. Apply the specified coating system
Apply the bonding agent, primer, and finish coats in the order specified, and stick to the mixing ratios, coat thickness, and recoat windows. Several thin, even coats usually level better than one heavy one. Watch vertical surfaces for runs, and stop brushing once the coating starts to set.
7. Let the finish cure completely
Dry-to-touch is not the same as fully cured. Keep water, dust, and objects off the surface for as long as the manufacturer or contractor states. Reinstall trim and apply bathroom-grade caulk only when the coating system allows it, and let the new caulk cure before you fill the tub.
Common Bathtub Reglazing Mistakes
Most early failures happen before the finish coat ever goes on. Silicone residue leaves craters. Glossy or unevenly prepared areas peel. Heavy coats sag or stay soft, and missing the recoat window weakens the bond between layers.
Dust, lint, and overspray leave a rough texture. Water exposure before full cure can mark the finish. Coating a moving crack just hides the symptom - the support problem is still there. Reglazing is a coating system, not ordinary bathroom paint.
How Much Does It Cost to Reglaze a Bathtub?
In the U.S., a standard professional bathtub refinishing job typically runs several hundred dollars. A 2026 This Old House cost guide puts many projects between $335 and $630, with an average near $480. HomeServe reports a broader range of roughly $350 to $1,400 or more, depending on project type and complexity. Treat these as market references, not fixed quotes.
Price climbs when the tub is large or ornate, both sides of a clawfoot tub need work, a surround is included, the old coating has to be stripped, or chips, rust, and cracks add repair time. Material, color change, access, local labor rates, ventilation setup, and the coating system all move the estimate too. Ask upfront whether surface repair, caulk removal and replacement, hardware handling, cleanup, cure-time instructions, and warranty coverage are included.
A DIY kit can look cheaper, but add abrasives, masking supplies, repairs, protective equipment, ventilation - and the risk of stripping a coating that fails. Compare the total project risk, not just the box price.
How Long Does Reglazing Take and Last?
The hands-on work can take a day, and repair, polishing, or a second visit stretches it further. Plan on the tub being off-limits for 24 to 72 hours or longer, depending on the product, temperature, humidity, and how it was applied. Go by the written cure instructions for your exact system, not a universal timetable.
How long it lasts varies just as widely. Preparation quality, coating compatibility, how stable the tub is, how the household uses it, and your cleaning habits all matter. Be suspicious of any lifespan claim that isn't tied to a named coating system and a written warranty.
How to Care for a Reglazed Bathtub
Clean regularly with a soft cloth or non-scratch sponge and an approved cleaner. Rinse away residue and fix chips promptly. Skip steel wool, abrasive powders, hard pads, harsh chemical mixtures, and suction-cup mats unless the refinisher says they're safe.
Final Decision: Reglaze or Replace?
Reglaze when the tub is structurally sound, still suits the room, and just needs a surface update. Choose replacement when there's structural damage, persistent leakage, poor support, extensive hidden deterioration, or a layout and size that no longer work. If replacement is the better long-term call, MESA's acrylic freestanding tubs are worth a look - or talk to the MESA team about dimensions, configuration, target-market requirements, and project quantity before you pick a model.
【FAQ】
1. Can every bathtub be reglazed?
No. Many porcelain, steel, cast-iron, fiberglass, and compatible acrylic surfaces can be refinished, but structural damage, rust-through, movement, or leaks may call for replacement. Confirm coating compatibility first.
2. Can you reglaze a bathtub without removing it?
Usually, yes. Refinishing is done in place. Depending on the system, fixtures and trim get removed or masked - but plumbing problems still have to be fixed separately.
3. How soon can you use a reglazed bathtub?
Many systems say at least 24 to 72 hours, but the real answer is the full cure time stated by the product manufacturer or contractor. Temperature and humidity can change the schedule.
4. Why is my reglazed bathtub peeling?
Common causes: silicone or soap residue, incomplete sanding, incompatible materials, moisture trapped under the coating, incorrect mixing, and use before full cure. A moving crack or a flexible tub floor can break the finish too.
5. Is reglazing cheaper than replacing a bathtub?
It's usually cheaper upfront when the existing tub is sound and can stay in place. Replacement can be the better value when the tub leaks, has structural damage, or would need extensive stripping and repair before another coating can be applied.


