





To replace the seal at the bottom of a shower door, identify its attachment style, measure the glass or retaining channel, and choose a matching replacement. Remove the worn strip, clean the mounting surface, cut the new seal to the required length, and fit it according to the manufacturer's instructions. Finish by checking that the door moves freely and testing for leaks.
The fitting itself may be straightforward. Choosing the correct seal takes more care: a strip can match the door's width yet still have the wrong grip, profile, or reach.
This guide focuses on accessible, replaceable bottom seals. If the work requires removing glass, loosening hinges, or dismantling a sliding-door system, use the door manufacturer's service instructions and arrange professional help where required.
Before You Replace the Seal Find the Leak
Start with a dry shower threshold and bathroom floor. Look at where water first appears during normal shower use, rather than judging only by where the puddle eventually collects.
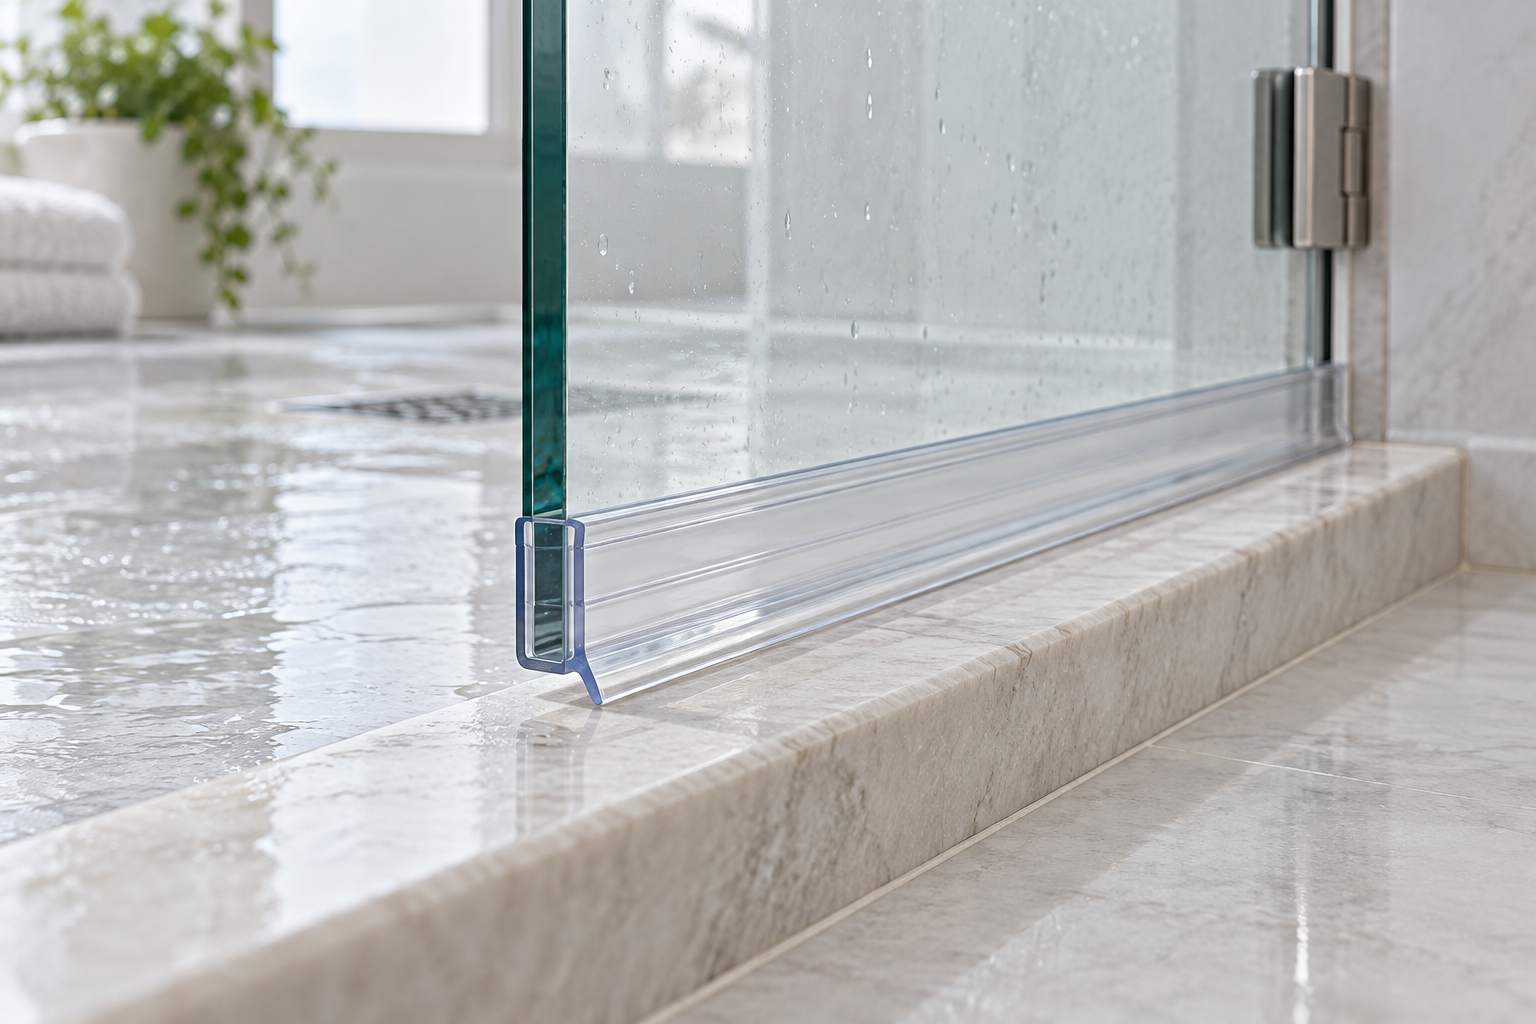
A split, missing, or distorted bottom sweep is a reasonable place to investigate when water escapes beneath the moving door. Water appearing beside a fixed panel or at a wall joint calls for a different inspection.
Open and close the door before removing anything. Does it catch on the threshold? Has one corner dropped? Is the bottom gap noticeably uneven? Record those symptoms. A replacement strip will not correct loose hardware or an installation problem.
Discoloration alone is less useful as a diagnosis. Check whether the seal remains securely fitted, whether its flexible sections are damaged, and whether water actually passes that location.
Stop if you find chipped glass, loose hardware, or unstable door movement. Resolve those problems before attempting a routine seal replacement.
Choose a Bottom Seal That Matches Your Door
"Shower door bottom seal" describes several parts. The attachment method determines which replacement you need.
|
Existing arrangement |
What to match |
|
A rigid channel gripping the bottom edge of exposed glass |
Glass thickness, channel profile, flexible-fin dimensions, and any drip rail |
|
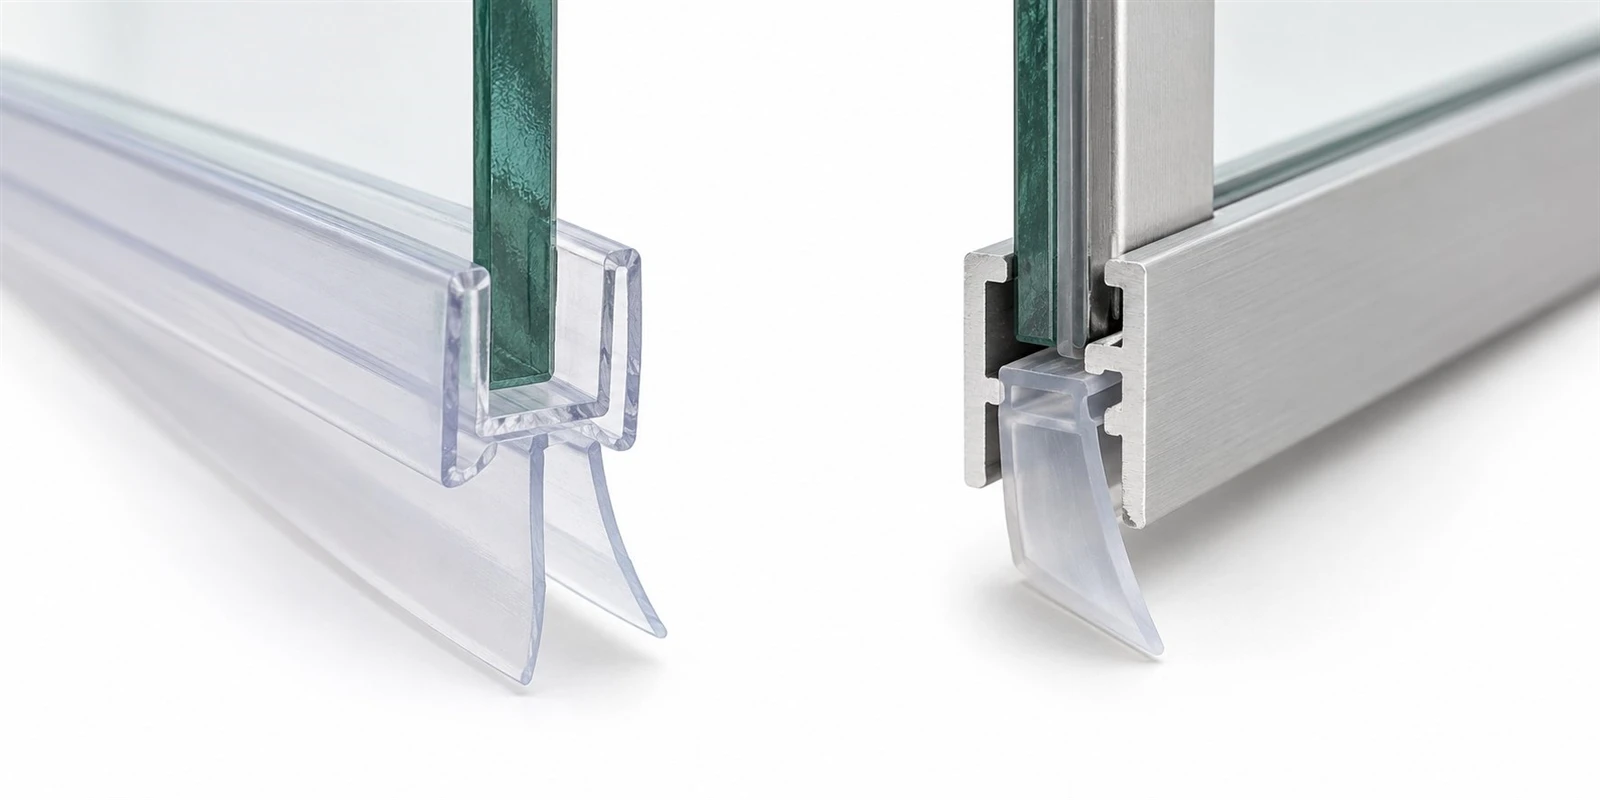
A flexible insert held inside a metal bottom rail |
The insert's cross-section and retaining-channel dimensions |
|
A separate adhesive or mechanically attached assembly |
The specified replacement assembly and its fitting instructions |
|
A seal incorporated into a sliding-door system |
The door model, parts diagram, and clearances around guides or tracks |
For a frameless shower door bottom seal, inspect the end of the old strip. The rigid section grips the glass; the softer section extends below it. Some designs also include a projecting rail that directs water toward the shower interior.
Manufacturer specifications matter here. For example, CRL lists a snap-on bottom rail specifically for 1/2-inch glass, illustrating why appearance alone cannot establish compatibility.
If you know the door brand and model, begin with its replacement-parts information. Otherwise, send a supplier a clear end-view photograph of the old seal together with your measurements.
Measure Before Ordering a Replacement
Keep the old strip until the new one has been installed and tested. It is useful for comparing the profile and end details, even if its flexible section has deteriorated.
Record these measurements:
|
Measurement or detail |
How to check it |
Why it matters |
|
Glass thickness |
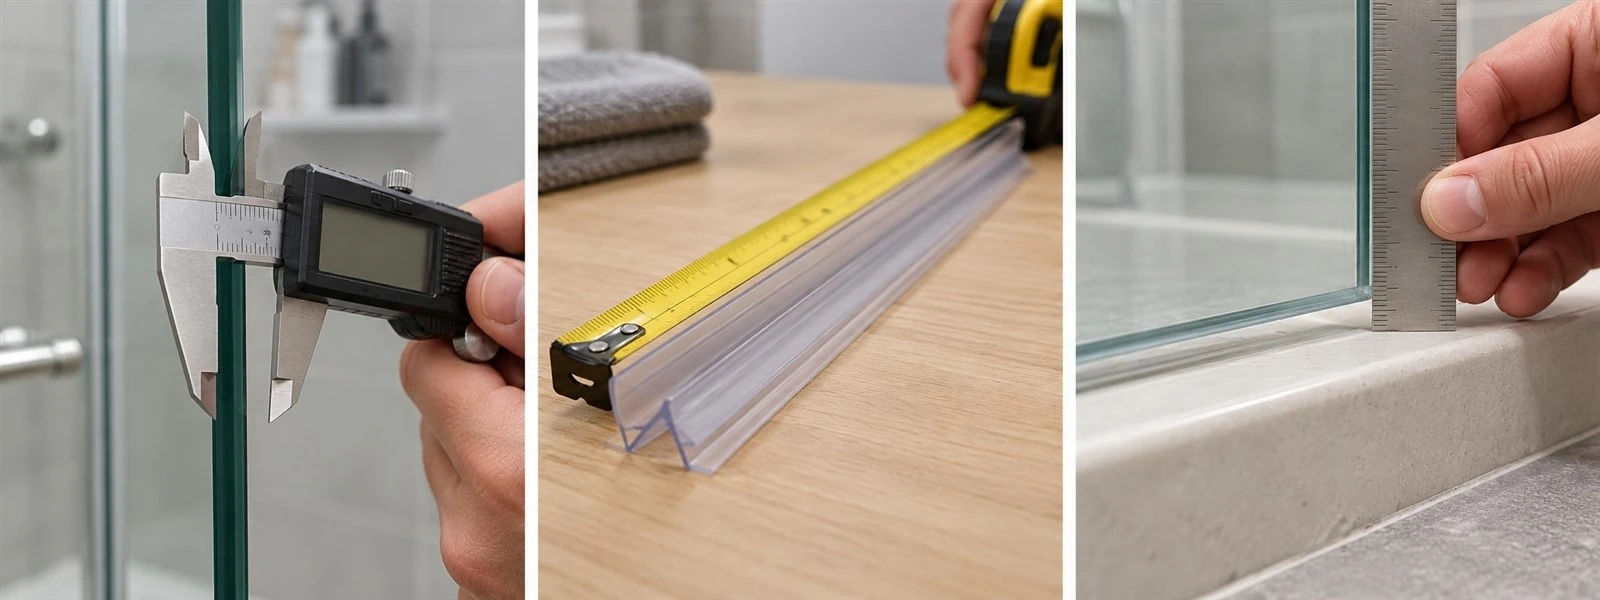
Measure an accessible, undamaged edge, preferably with calipers |
Determines compatibility with a glass-gripping channel |
|
Required seal length |
Measure the intended mounting span and check the original end arrangement |
Prevents short coverage or interference at the ends |
|
Gap below the glass |
With the door closed, measure at both ends and the middle |
Helps select the specified reach of the flexible section |
|
Existing profile |
Photograph the strip from its end beside a ruler |
Distinguishes parts that look similar from the front |
|
Door movement |
Note swing direction, sliding guides, and nearby fittings |
Identifies possible interference |
Do not measure over the old plastic channel when checking glass thickness. For a framed door, the retaining groove may be the relevant dimension instead.
Check units carefully when comparing parts sold in inches and millimeters. Use the supplier's stated compatibility rather than assuming nearby nominal sizes are interchangeable.
Also distinguish overall seal height from the gap the seal is designed to accommodate. Part of a seal's height may sit around the glass. A dimensioned cross-section is more useful than an unlabelled product photograph.
If the gap varies substantially across the door, investigate the reason before ordering a deeper sweep.
How to Replace a Shower Door Seal at the Bottom
The steps below describe a common replacement sequence. Follow the instructions for your particular door and seal wherever they differ.
1 Prepare the Door and Your Tools
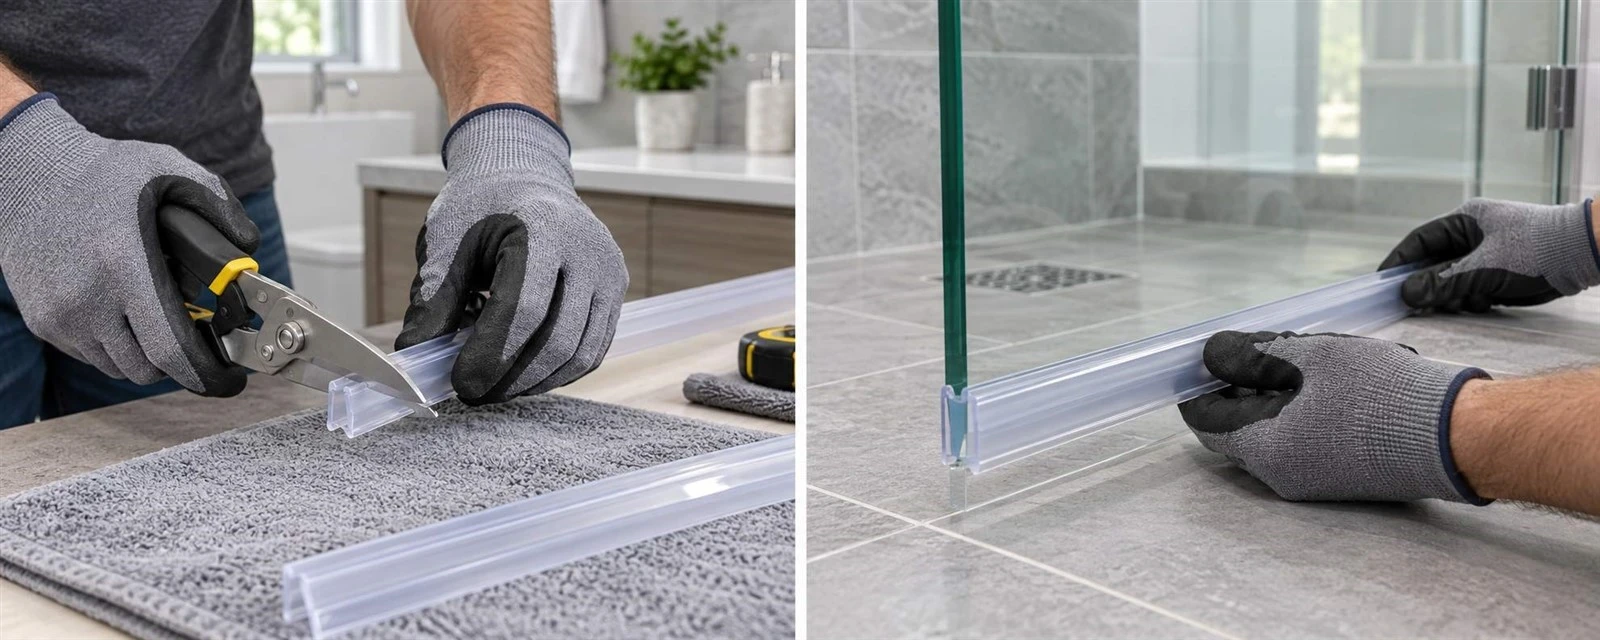
Have the replacement seal, measuring tool, marker, microfiber cloths, and an appropriate cutting tool ready. Depending on the material, the supplier may recommend trim shears or a fine-tooth saw for the rigid section. Ordinary scissors may only suit the soft fins.
Wear suitable hand and eye protection when cutting. Keep the floor dry and place a towel below the work area to catch debris.
Position the door so you can reach the seal without straining it. Do not wedge tools against the glass, and leave hinges, rollers, and structural fixings alone.
2 Photograph and Remove the Old Seal
Photograph both ends and the side profile before removal. Include the relationship between the bottom strip, vertical seals, and nearby hardware.
For a friction-fit channel, use controlled hand pressure to ease it off in the direction appropriate to its design. Work progressively rather than twisting one end sharply against the glass.
For an insert inside a metal rail, check whether an end cap or retainer must be released. Do not dismantle the rail unless the service instructions describe that procedure.
If the strip resists removal, inspect for adhesive, a hidden retainer, or a different attachment method. Avoid levering it off with a metal screwdriver.
3 Clean and Inspect the Mounting Surface
Remove soap residue and loose deposits with a soft cloth and a cleaner approved for the glass, coating, and frame finish. Rinse where required and dry the mounting area.
Use a compatible plastic scraper for stubborn residue if the manufacturer allows it. Avoid treating vinegar, alcohol, abrasive pads, or solvent cleaners as universally suitable.
Inspect the exposed glass edge or retaining channel. Stop if the glass is chipped or cracked. For a framed assembly, look for obstructions that would prevent the replacement insert from seating properly.
Leave drainage openings clear. Adding sealant to every visible opening can interfere with the enclosure's intended drainage.
4 Mark and Cut the Replacement
Confirm the required finished length against the door and the replacement instructions. Use the old strip as a reference, but check whether it has shrunk, stretched, or was previously cut short.
Mark the new part and cut it on a stable work surface, away from the glass. Support the rigid section so the cut does not crush or split it.
Some installations require an end notch or a particular meeting detail with a vertical seal. Reproduce this only when the door or part instructions call for it. There is no single end-gap allowance suitable for every shower door.
Remove loose cutting debris and inspect the end before fitting.
5 Fit the New Bottom Seal
For a compatible press-on channel, seat it progressively along the glass edge using even hand pressure. Check that it is fully engaged throughout its length. Do not hammer it into place or use adhesive to compensate for a loose fit.
Check the orientation before completing installation. Where the profile includes an inward-facing drip lip, follow the manufacturer's diagram. VIGO's VG06072 instructions, for example, specify that the bottom seal lip faces the shower interior; this is a model-specific detail to verify on your own door.
For a rail-mounted insert, follow the specified insertion method and refit any required retainers. Adhesive-backed or screw-mounted assemblies need their own surface-preparation and fastening instructions.
If the replacement requires excessive force, stop and recheck the dimensions, profile, and mounting surface.
6 Check Movement and Test for Leaks
Move the door slowly through its normal travel. Check for catching, folding fins, interference with guides, or contact that prevents the door from closing correctly.
The flexible section should work within the replacement part's specified clearance. Do not assume that heavier dragging means better sealing.
Next, dry the surrounding area and test with the door closed under normal shower conditions. Observe the bottom edge and both corners separately. Avoid aiming a concentrated handheld jet into a joint as your only test.
If the installation involved a specified adhesive or sealant, observe its required curing time before exposing it to water.
Why Does the Shower Door Still Leak
A new sweep addresses only the part of the enclosure it was designed to protect. Use the location and timing of the remaining leak to guide your next check.
|
What happens |
What to inspect next |
|
Water passes beneath the middle of the door |
Seal seating, orientation, and specified gap coverage |
|
Water appears at one bottom corner |
The meeting point between bottom and vertical seals |
|
The door catches after replacement |
Profile height, seating, end cuts, and hardware clearance |
|
The strip loosens during use |
Glass compatibility, mounting cleanliness, and correct engagement |
|
Water appears beside a fixed panel |
Fixed-panel joints and the enclosure's sealing instructions |
|
Water collects in a sliding track |
Drainage openings, track condition, and panel arrangement |
Change one variable at a time and repeat the test. Replacing several seals and adding silicone simultaneously makes it harder to identify the cause.
If the strip fits correctly but water still escapes, have the enclosure's alignment, threshold drainage, and joints assessed as appropriate. Repeatedly fitting a longer fin can create closing resistance without resolving the original problem.
Care for the Seal and Keep Its Replacement Details
Clean the seal with products approved for the enclosure. Rinse away residue where required, remove trapped debris, and allow the shower area to dry between uses.
Inspect the flexible sections when cleaning. Cracks, tears, persistent deformation, or a channel that no longer holds securely are more useful replacement signals than a fixed calendar interval.
After a successful shower door sweep replacement, save the part number, supplier, finished length, and a photograph of the installed profile. Keep the door model information with that record.
For hotels, apartments, and rental portfolios, add the room or unit number. A labelled record makes the next maintenance request much easier to resolve.
Planning Shower Doors for Rental Properties or Projects
Replacement-part identification is worth discussing before a bulk order. Ask the supplier which bottom-seal profile belongs to each door model, how it is replaced, and what information will be needed for future parts inquiries.
For distributors and contractors planning a new installation, explore MESA shower doors and shower fittings and accessories.
To discuss a MESA product or project requirement, contact the MESA team with the model or order reference, relevant dimensions, quantity, and photographs. Compatibility and availability of any requested replacement part should be confirmed for the specific model.
FAQ
Can I replace the bottom seal without removing the shower door?
Often, an accessible press-on bottom seal can be replaced while the door remains installed. This depends on the design and available access. If replacement requires removing glass or disturbing hinges, rollers, or structural fittings, follow the manufacturer's service requirements.
Does a shower door bottom seal need silicone?
A friction-fit replacement should hold by its intended channel fit. Do not add silicone simply because the replacement is loose. Adhesive-mounted assemblies and enclosure joints may have different requirements, so follow the instructions for that component.
What size shower door sweep do I need?
Match the attachment method, glass thickness or retaining-channel profile, required length, and specified bottom-gap range. Send the supplier an end-view photograph of the old seal if the profile is unclear. Length alone does not establish compatibility.
How often should I replace the bottom seal?
Base replacement on its condition and performance. Inspect for splits, tears, distortion, loss of grip, and leakage at the seal. Usage, cleaning products, and the particular material affect how it ages, so a universal replacement interval is unreliable.
Why is my shower door leaking after I replaced the seal?
Check that the replacement is fully seated, correctly oriented, and suited to the gap. Then inspect the bottom corners, adjoining seals, and nearby joints. Water can travel before it reaches the floor, so locate the first point of escape before making another repair.


