


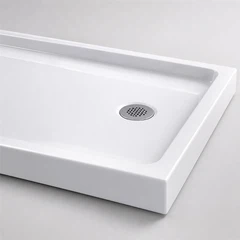



How to Clean a Fiberglass Bathtub Without Damaging the Finish
To clean a fiberglass bathtub safely, start with warm water, mild liquid dish soap, and a microfiber cloth or non-scratch sponge. Let the solution work briefly, wipe with light pressure, rinse, and dry before judging the result. Use a targeted treatment only after identifying soap film, mineral scale, rust, mildew, or a worn finish.
That diagnosis matters because "fiberglass tub" describes the reinforced structure more than the surface you touch. The visible layer may be gel coat, another resin finish, or acrylic reinforced with fiberglass. Its care manual always outranks a universal internet recipe.
Use a lowest-risk-first sequence: test, apply, allow controlled contact time, agitate gently, rinse, dry, and reassess. This reduces the chance of trading a stain for permanent dullness or scratches.
Before Cleaning: Identify the Surface and Its Condition
Look for a label, model number, manual, warranty, or manufacturer care page. A product safe for porcelain, tile, or one brand's composite is not automatically safe for every fiberglass finish. For a refinished tub, follow the refinisher's instructions because the new coating controls compatibility.
Inspect a clean, dry area under side lighting. Chalkiness, widespread loss of gloss, cracking, flaking, exposed fibers, or a patch that darkens when wet suggests coating damage. Cleaning removes material on a finish; it cannot rebuild a deteriorated one.
What You Need
- Warm water and mild liquid dish soap, or a non-abrasive cleaner explicitly approved for the surface
- Microfiber cloths and a soft, non-scratch sponge
- A spray bottle or small bucket, clean towels, and gloves
- Good ventilation; run the exhaust fan and open the door or window
- Optional stain-specific product only after checking the tub manual and cleaner label
How to Clean a Fiberglass Bathtub Step by Step
- Clear and inspect. Remove bottles, mats, toys, and metal containers. Check for chips, failing caulk, loose drain trim, or refinished areas before wetting the tub.
- Rinse. Use warm-not boiling-water to remove hair and loose grit. This also reduces dry friction during wiping.
- Apply the mild cleaner. Spread diluted dish soap or an approved non-abrasive cleaner across the walls, waterline, floor texture, drain, and corners.
- Control dwell time. Leave it for two to five minutes, or the label-specified time. Keep it wet and do not assume a longer soak is safer.
- Agitate lightly. Wipe in overlapping passes. On textured flooring, change direction and use more passes instead of more force.
- Rinse, dry, and reassess. Remove all cleaner, towel-dry, and examine the surface. Cleaner residue and water droplets can mimic haze. Repeat this mild cycle once if needed.

Diagnose the Stain Before Escalating
|
What you see |
Most likely cause |
Safest first response |
|
Slippery, waxy film |
Soap scum and body oils |
Mild dish soap; short dwell; soft wipe; rinse and dry |
|
White, chalky rings |
Hard-water minerals |
Manufacturer-approved descaler or diluted vinegar after a patch test |
|
Orange or rusty spot |
Metal contact or iron in water |
Remove the source; use only a finish-approved rust treatment |
|
Yellow or brown cast |
Residue, minerals, dye, or finish aging |
Run the baseline clean, dry, then judge texture and gloss |
|
Black spots at a seam |
Mildew on or beneath caulk |
Clean and dry; replace failed caulk if staining is underneath |

Soap Scum and Body-Oil Film
Soap scum feels waxy or makes a damp cloth drag; body oils and conditioner strengthen it near the waterline. Reapply mild soap, allow a short dwell, then wipe and rinse. Two gentle cycles beat a gritty powder or hard scrub. White haze remaining after drying may include minerals.
Hard-Water Scale
Minerals appear as white or gray rings near the faucet, drain, or waterline. Confirm that the manufacturer permits acid. If so, patch-test diluted vinegar or use an approved descaler for the label-directed contact time. Protect acid-sensitive stone and metal, then rinse and dry. Never leave acid overnight.
Rust-Colored Marks
An orange ring may come from a metal can, dripping fixture, or iron in water. Remove the source first. For a persistent spot, use only a rust remover explicitly compatible with the finish; patch-test, time the dwell, and rinse. Recurrence near the faucet calls for checking the water or plumbing.
Yellow or Brown Discoloration
Yellowing may come from product residue, dye, minerals, aging resin, or a worn topcoat. Clean and dry before deciding. If permitted, test a thin baking-soda-and-water paste on a small deposit with minimal pressure; baking soda is mildly abrasive. Uniform color plus roughness or lost gloss suggests finish wear.
Mildew at Caulk, Seams, or Anti-Slip Texture
Dark spotting collects where moisture lingers. Remove visible soil with detergent and water, rinse, and dry. The U.S. EPA does not recommend bleach as routine mold cleanup; moisture control is the durable fix. If staining sits beneath cracked caulk, replace the sealant after cleaning and drying. Extensive growth may need professional assessment.
Critical chemical rule: Never mix bleach or any disinfectant with vinegar, ammonia, or another cleaner. CDC guidance warns that dangerous vapors can be released. Use one product at a time, rinse between methods, ventilate, and follow both the tub manufacturer's instructions and the cleaner label.
Cleaning Is Not the Same as Disinfecting
Routine care is cleaning: water, detergent, and gentle agitation remove soil and many germs. CDC guidance says home disinfection is generally unnecessary unless someone is or was recently ill. When warranted, clean first, then use a surface-compatible disinfectant at its labeled dilution and wet contact time with proper ventilation. Never use bleach merely to chase yellowing.
A Safe Escalation Ladder
- Level 1 - Repeat the baseline clean once. Fresh solution and complete rinsing solve more haze than extra pressure.
- Level 2 - Use one deposit-specific treatment permitted by the manufacturer. Patch-test in a hidden area and time the dwell.
- Level 3 - Stop and contact the manufacturer or a qualified bath-surface professional if the finish changes, the stain recurs, or the material is uncertain.
- Level 4 - Repair, refinish, or replace when the coating is cracked, peeling, deeply worn, or exposing reinforcement. Cleaning is no longer the appropriate remedy.
What Not to Use-and Why
- Steel wool, pumice, scouring pads, stiff brushes, abrasive powders, or aggressive melamine foam: they can scratch or dull the visible layer.
- Razor blades, metal scrapers, or sharp tools: they can gouge the coating and open a path for recurring soil.
- Toilet-bowl cleaner, oven cleaner, drain cleaner on the tub surface, acetone, paint thinner, or unapproved solvents: they may etch, soften, discolor, or crack finishes.
- Undiluted concentrates, unlabeled mixtures, and extended soaking: more exposure increases risk without proving better results.
- High-pressure steam or very hot water: heat and force may stress a vulnerable coating or sealant.
When a 'Stain' Is Really Surface Damage
Stop cleaning when a dry area stays chalky or rough, cracks, flakes, exposes fibers, or has soft spots. Investigate movement, leakage, and failed seams. Local chips may accept a compatible repair; widespread failure may need professional refinishing or replacement. Ask how repair affects slip resistance, cleaner compatibility, ventilation, warranty, and service life.

A Practical Maintenance Schedule
After use: rinse the waterline and any visible bath-product residue; remove metal cans and wet mats.
- Several times a week in hard-water homes: squeegee or towel high-deposit zones so minerals do not repeatedly dry in place.
- Weekly for a frequently used tub: run the mild baseline clean and dry the corners, drain area, and caulk.
- Monthly: inspect caulk, faucet drips, drain trim, texture, and gloss; address a new defect before it becomes a cleaning problem.
Adjust for household size, bathing products, water hardness, and ventilation. Prevention means reducing how long soap, minerals, and moisture remain on the finish.
Fiberglass and Acrylic Are Related, Not Interchangeable
A fiberglass tub commonly uses resin and glass-fiber reinforcement beneath a finished surface. An acrylic bathtub has an acrylic shell and may also use fiberglass for structural reinforcement. Because the exposed layer determines care, the words "fiberglass reinforced" do not make cleaning instructions interchangeable. When comparing a replacement, review the visible surface, construction, repair options, warranty, installation method, and maintenance instructions together.
Project buyers, distributors, and remodelers can explore MESA acrylic freestanding bathtubs and discuss surface-care documentation for their market and application.
Final Takeaway
The best way to clean a fiberglass bathtub is to make each escalation evidence-based. Confirm the finish, begin with detergent and soft tools, identify the remaining deposit only after rinsing and drying, and use one compatible treatment at a time. When texture or gloss shows coating failure, protect the tub by moving from cleaning to professional repair or replacement evaluation.
Need Bathtub Support for a Project?
Planning a residential, apartment, hotel, or retail bathtub program? Contact the MESA team to discuss suitable acrylic bathtub styles, specifications, documentation, customization needs, and market requirements.
FAQs
What is the safest everyday cleaner for a fiberglass tub?
Warm water with a small amount of mild liquid dish soap is a conservative starting point. A manufacturer-approved non-abrasive cleaner is also appropriate. The product manual has final authority.
Can I use vinegar on fiberglass?
Only if the manufacturer permits it. Diluted vinegar can help dissolve mineral deposits, but it is an acid. Patch-test, use a short dwell, rinse thoroughly, and protect nearby stone and metal.
Can I mix vinegar and baking soda?
The fizz is visually dramatic, but the acid and alkali neutralize each other. Choose the ingredient that matches the deposit and the surface instructions rather than combining products indiscriminately.
Will bleach make an old yellow tub white again?
Not if the color comes from an aged or worn finish. Bleach may also be prohibited on the surface. Use it only for a justified disinfection need when both the tub instructions and disinfectant label allow it-never with another cleaner.
How do I know when to stop scrubbing?
Stop if the dry surface is rough, chalky, cracked, peeling, losing gloss, or exposing fibers, or if a patch test changes the color or sheen. Those signs call for repair advice, not more force.


